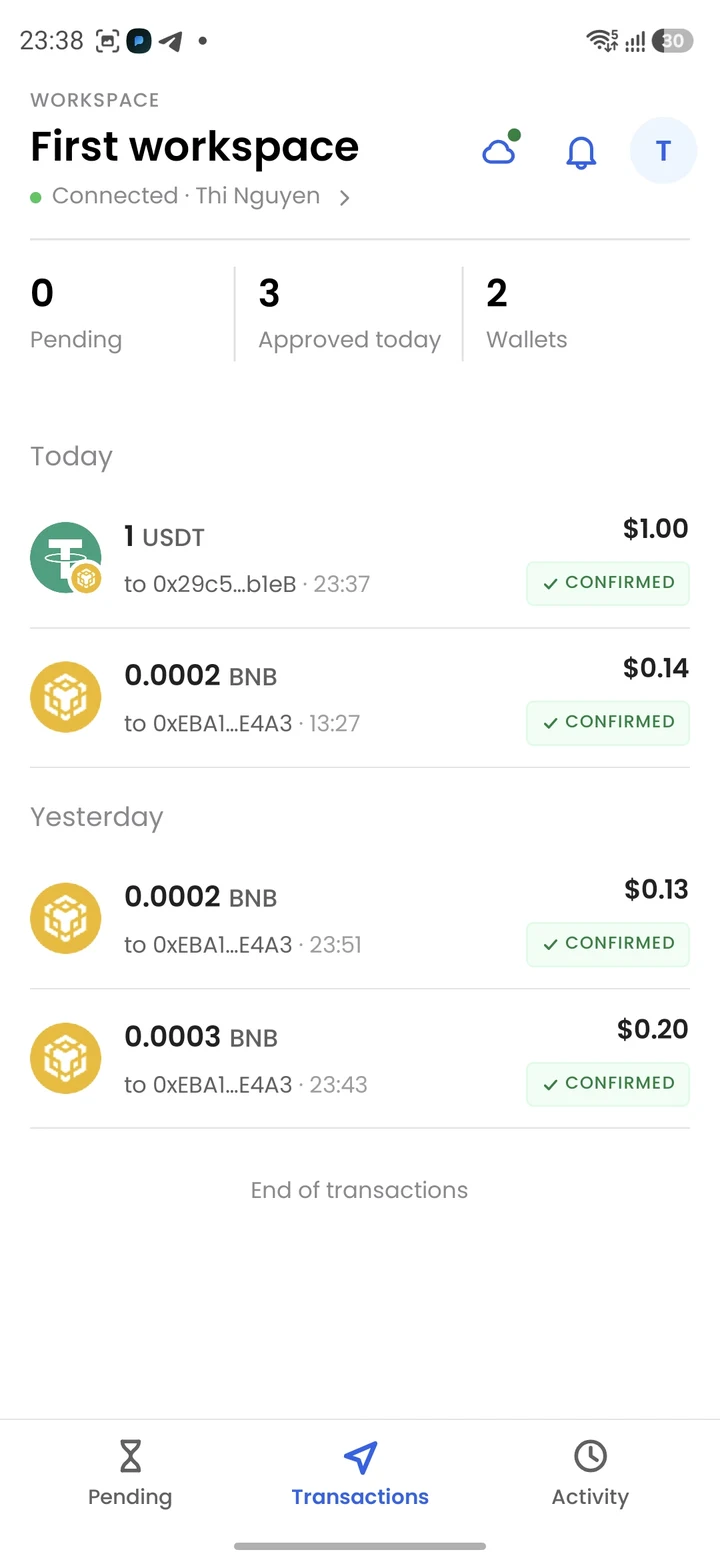
Co-signed Wallet
A co-signed MPC wallet splits its signing key between Fystack and one or more cosigners you control, such as the Fystack Cosigner mobile app. Every key share is required to sign, so Fystack can never move funds alone.
This guide walks through the two flows you will use most:
- Create a co-signed wallet: approve the key generation on your phone and back up your key share.
- Withdraw and sign: start a withdrawal on the dashboard and sign it on your phone.
Before you start, install the Fystack Cosigner mobile app and connect it to your workspace. Your phone appears as a cosigner you can pick when creating a wallet. For a server-side cosigner, see the Cosigner documentation.
Create a Co-signed MPC Wallet
Step 1: Open Create Wallet
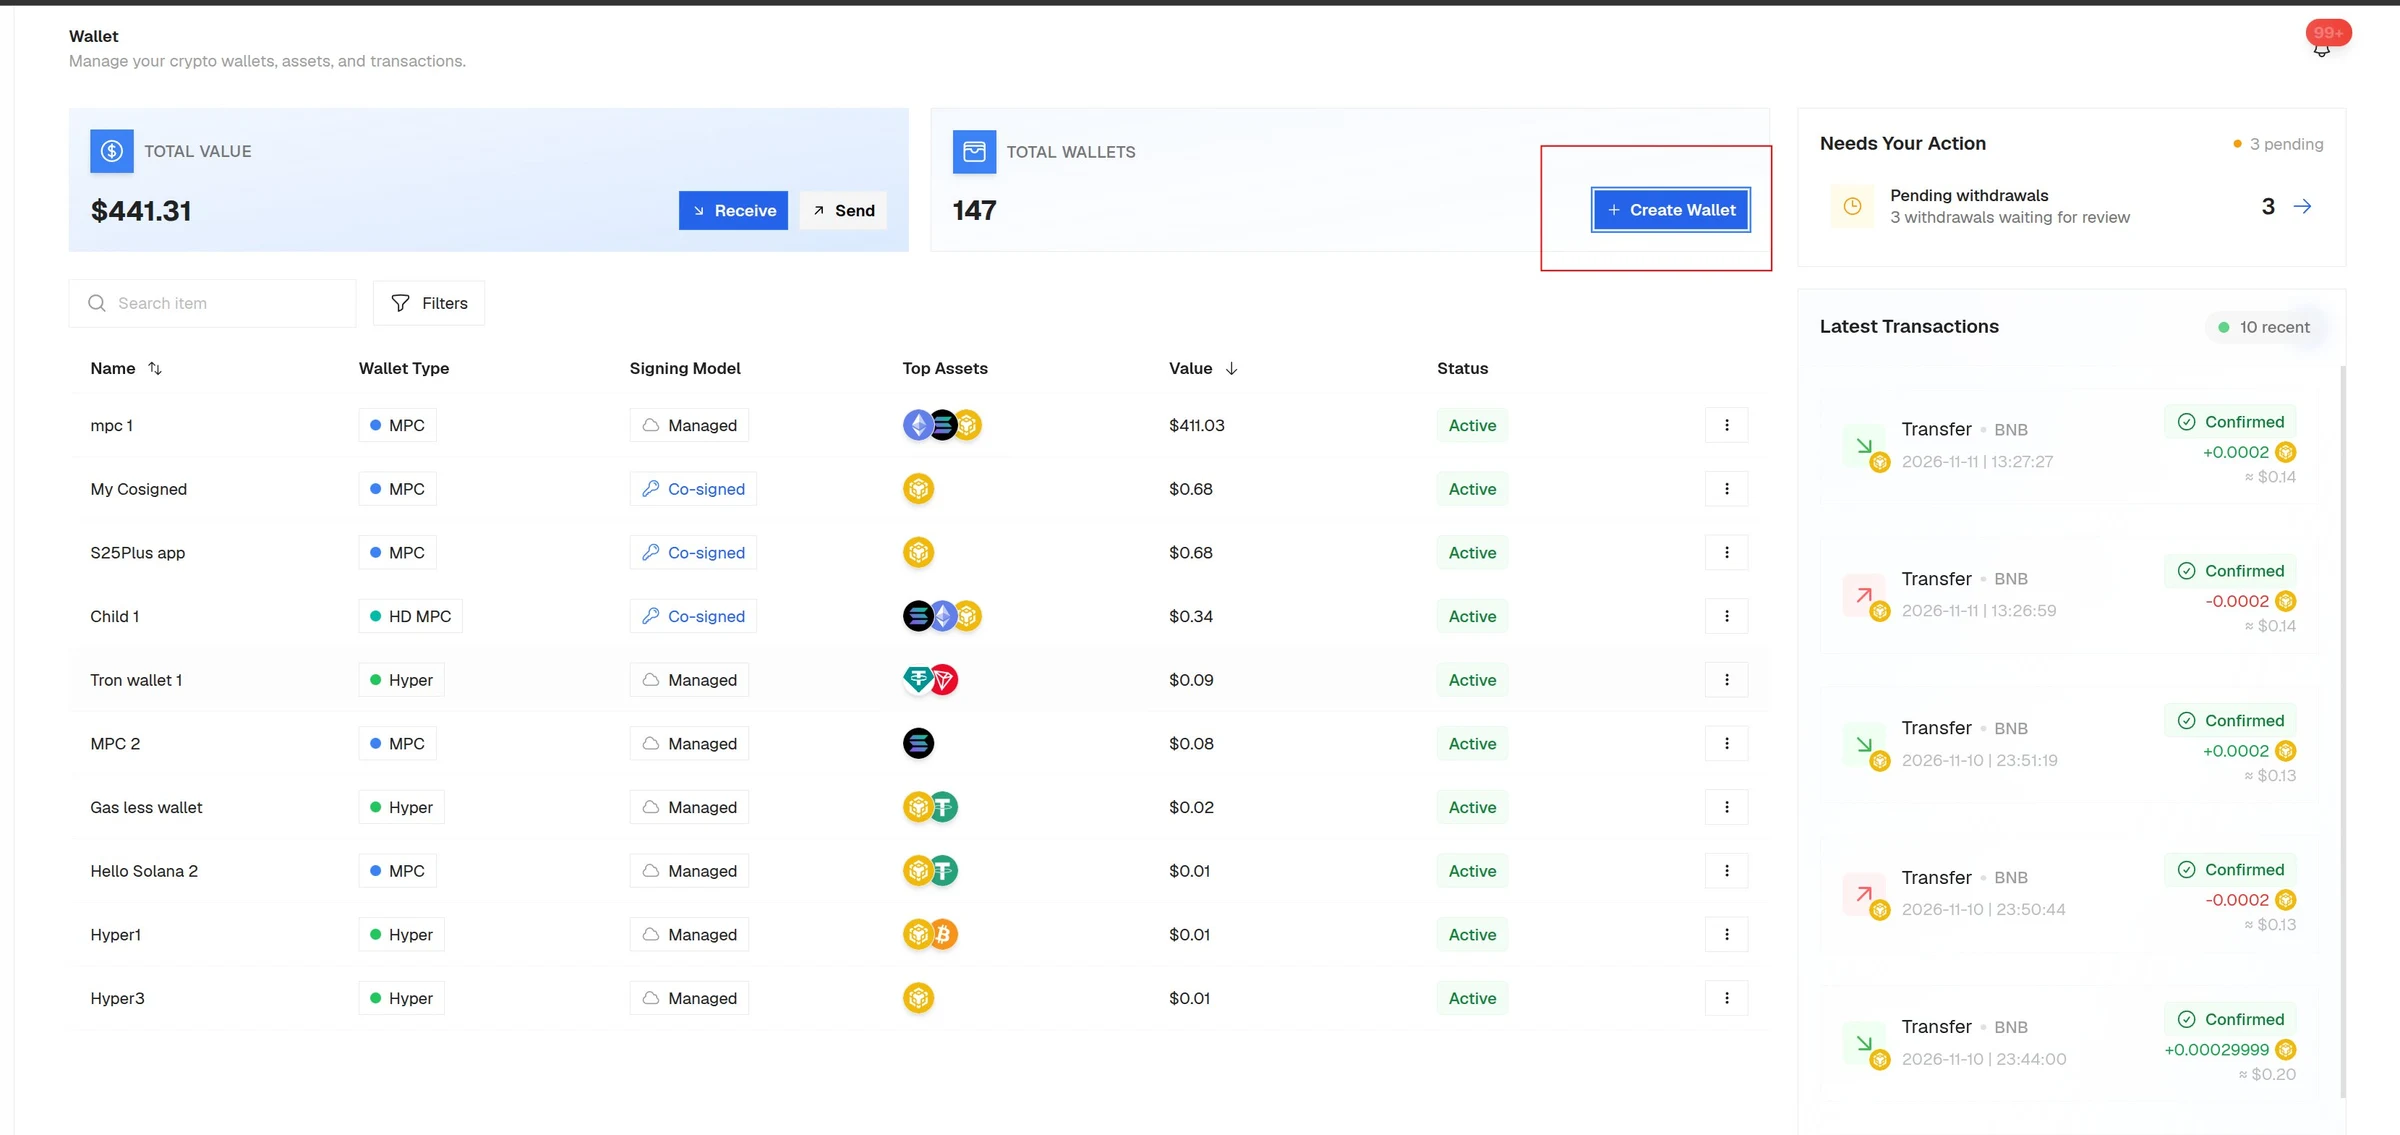
Sign in to the Fystack dashboard, go to Wallet in the sidebar and click Create Wallet.
Step 2: Choose Co-signed MPC
Switch to the Co-signed tab and select Co-signed MPC. This wallet type is signed together with your cosigners and works with both a Mobile cosigner and a Server cosigner.
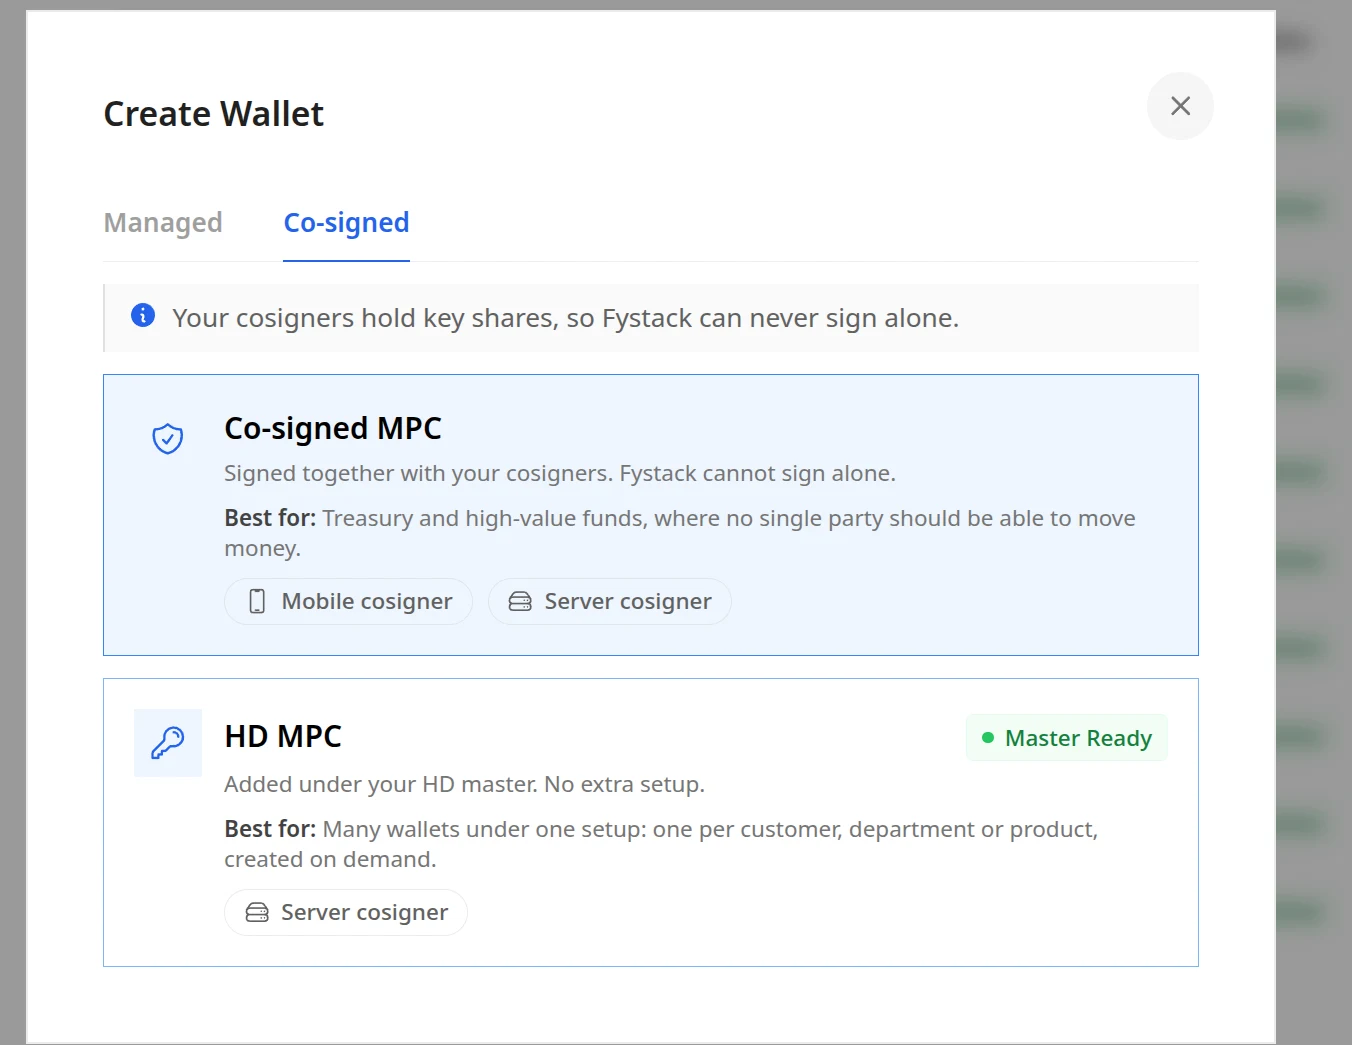
HD MPC creates child wallets under an existing HD master and needs no extra setup. Use it when you need many wallets, for example one per customer.
Step 3: Configure Cosigners and Threshold
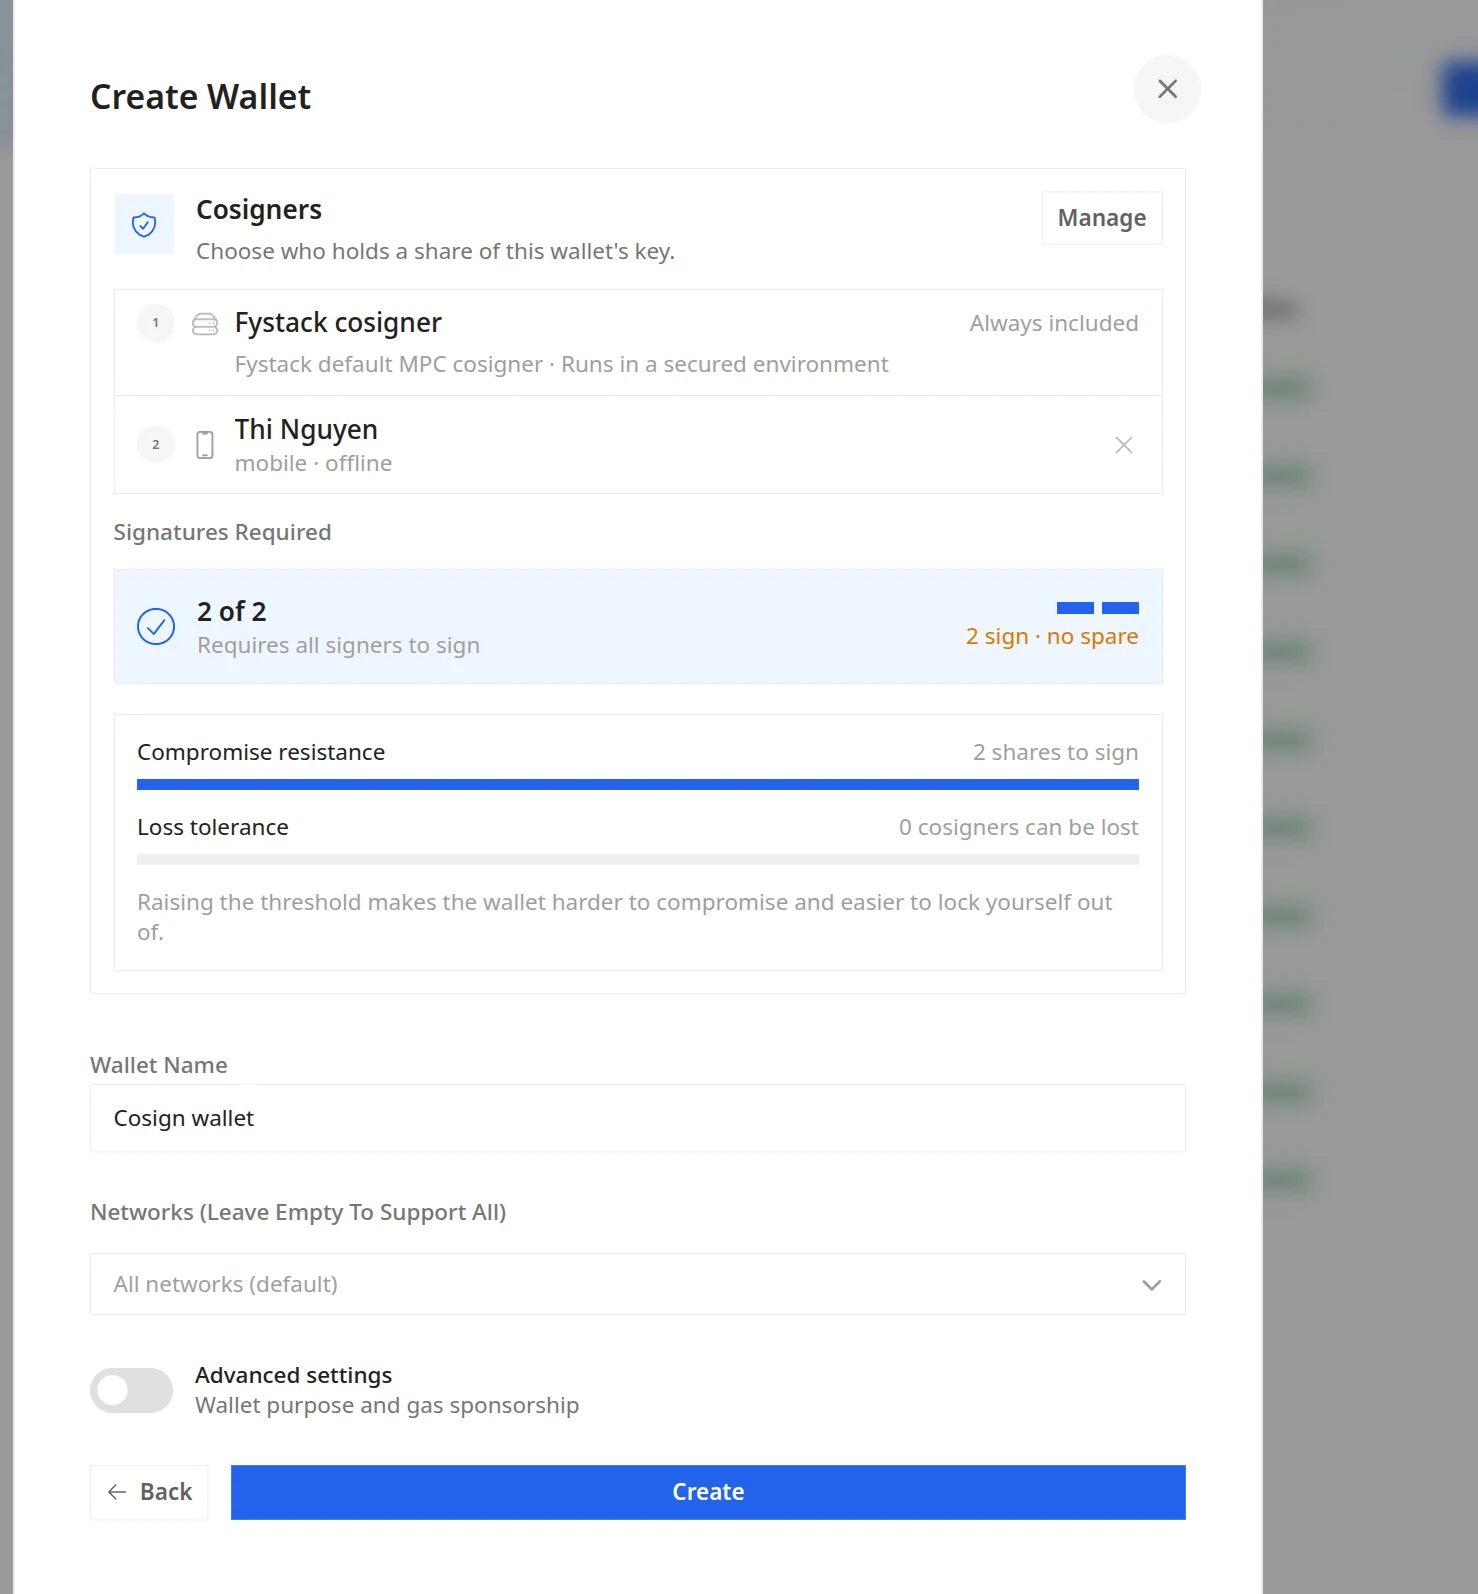
Set up who holds a share of the wallet key:
- Cosigners: the Fystack cosigner is always included. Click Manage to add your mobile cosigner.
- Signatures Required: the number of cosigners that must sign each transaction. With 2 of 2, every cosigner must sign.
- Wallet Name: a name to identify the wallet.
- Networks: leave empty to support all networks.
The Compromise resistance and Loss tolerance bars show the trade-off: a higher threshold makes the wallet harder to compromise, but leaves less room if a cosigner is lost.
Click Create.
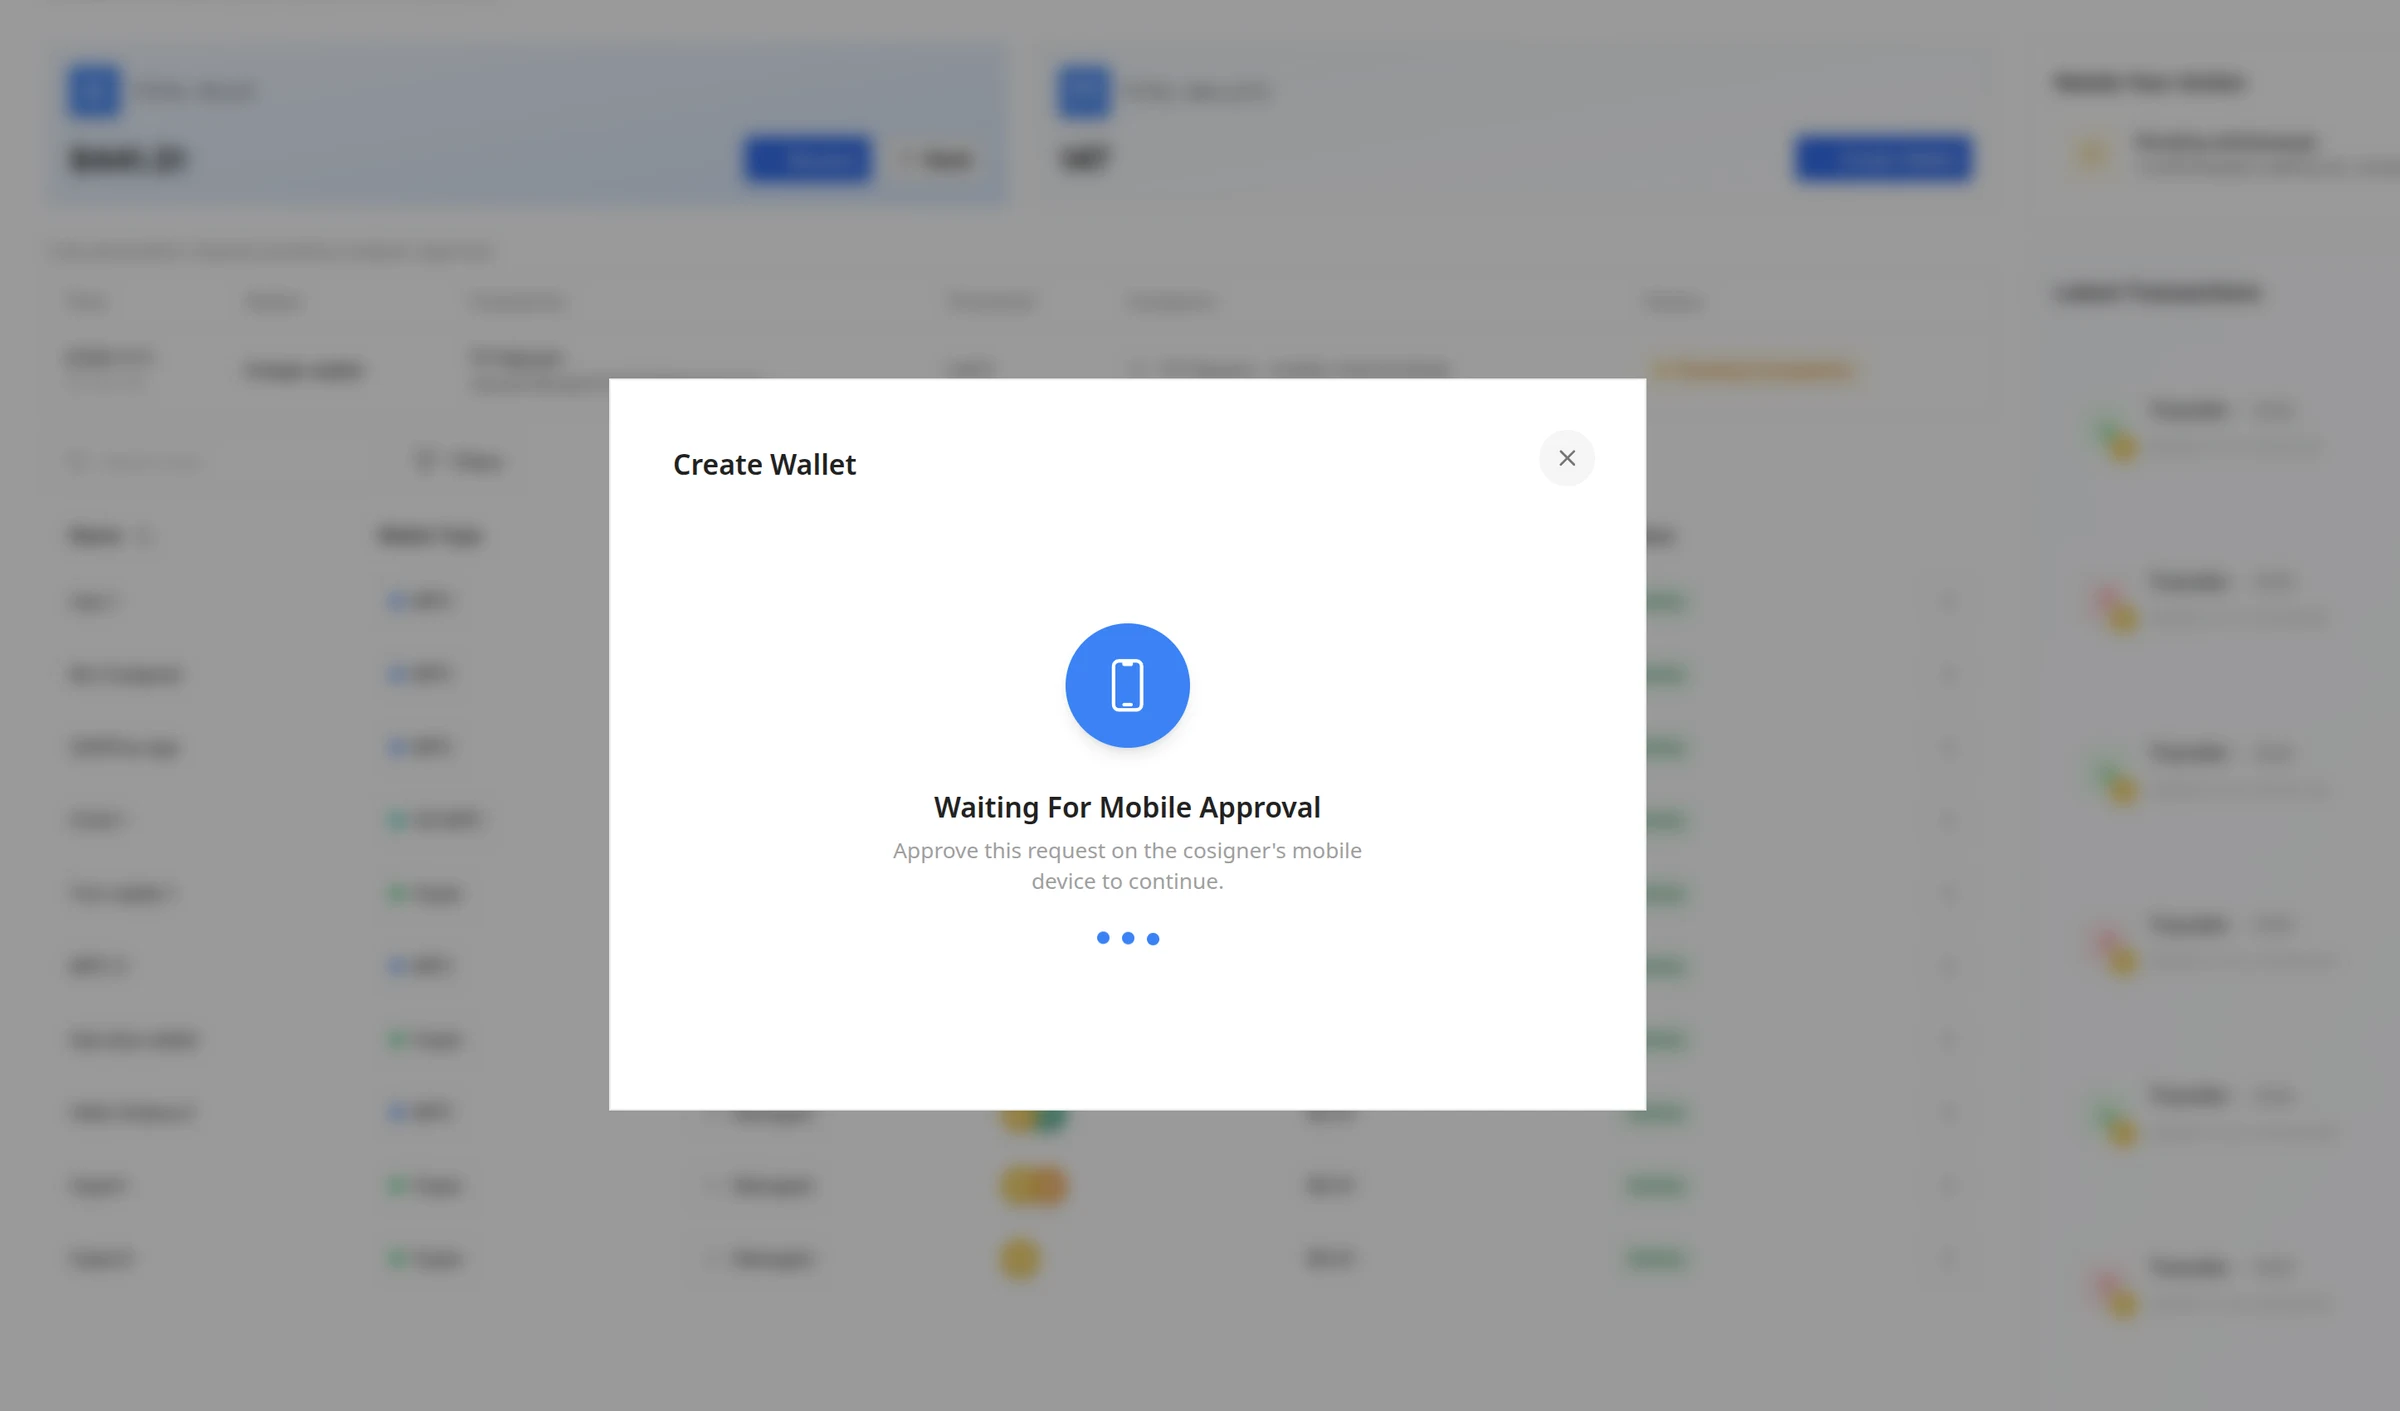
Step 4: Wait for Mobile Approval
The dashboard now waits for your cosigner to approve the key generation. Keep this dialog open and pick up your phone.
Step 5: Approve the Key Generation on Your Phone
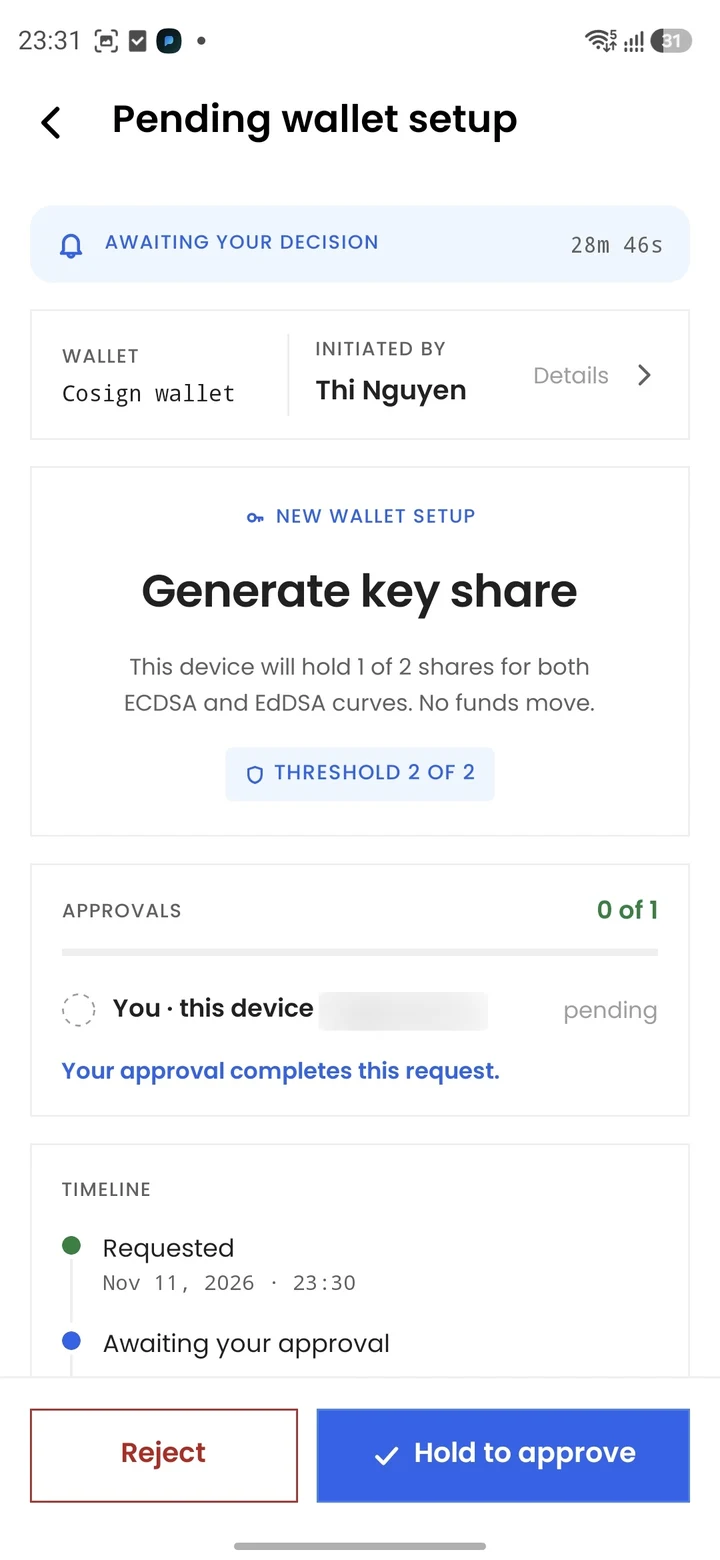
Open the Fystack Cosigner app. The new wallet appears under Wallet setup with a Key generation tag. Tap it to review:
- The wallet name and who initiated the request
- The threshold, for example 2 of 2
- What happens next: your device generates and keeps 1 of the key shares for both ECDSA and EdDSA curves. No funds move.
Press and hold Hold to approve. Tap Reject if you did not expect this request.
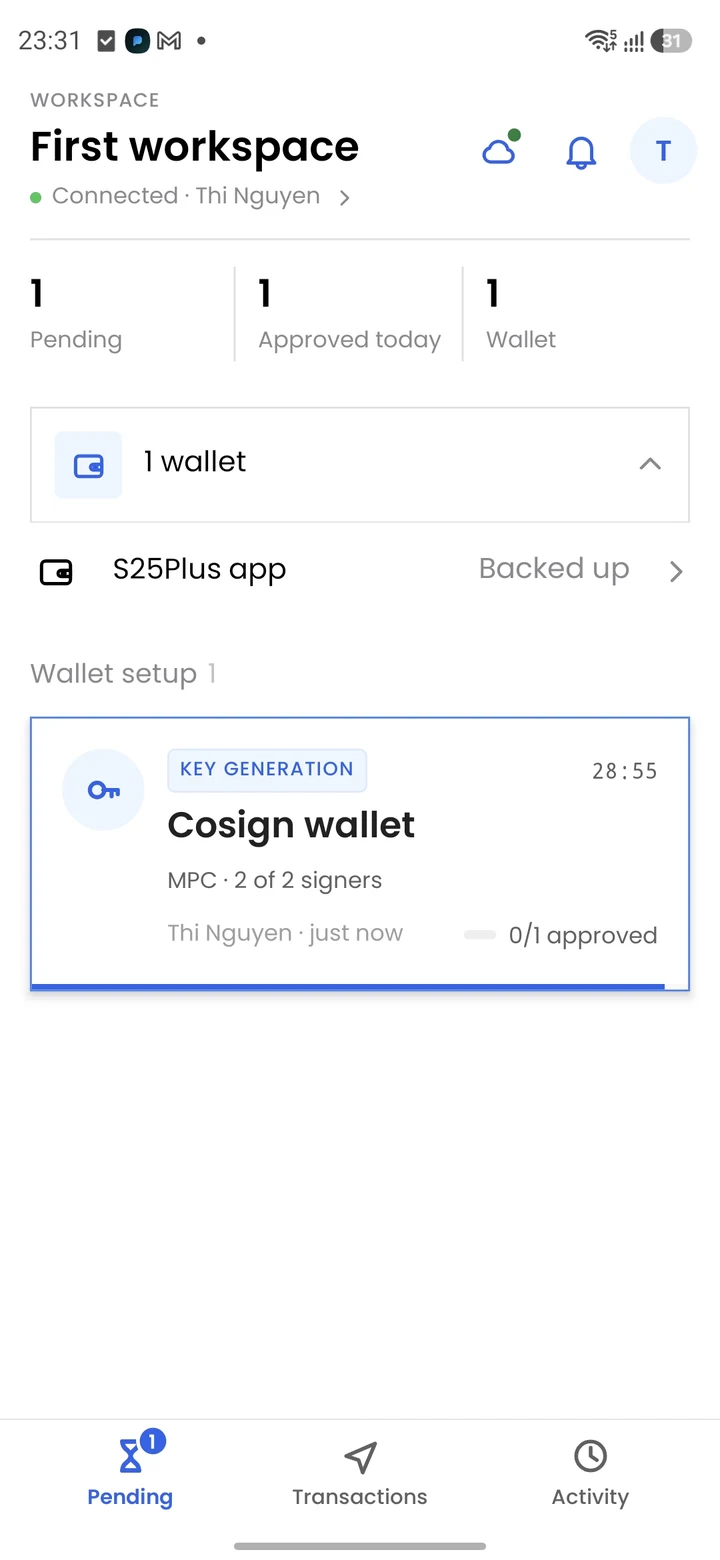
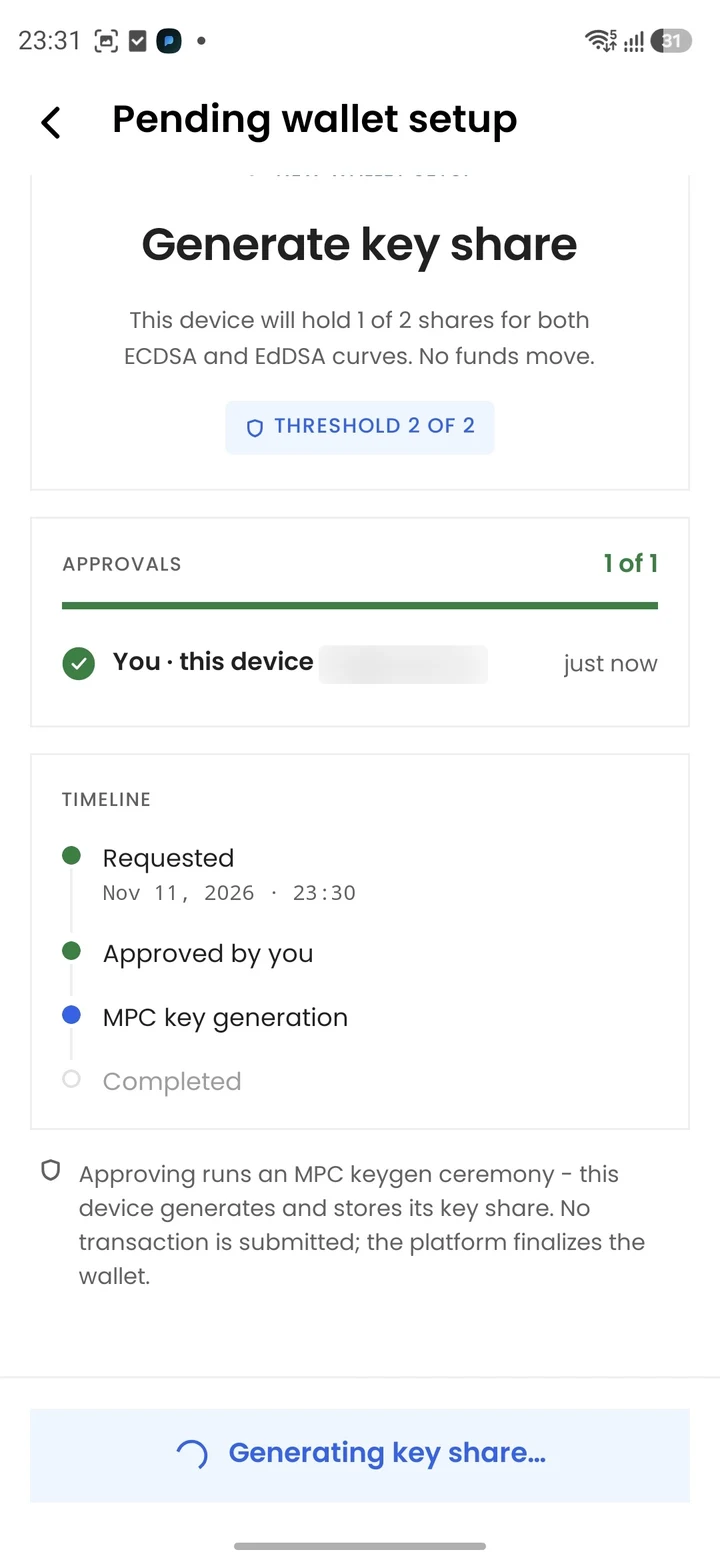
The app runs the MPC key generation ceremony with Fystack. Keep the app open until it finishes. The timeline moves from Approved by you to MPC key generation and then Completed.
Step 6: Back Up Your Key Share
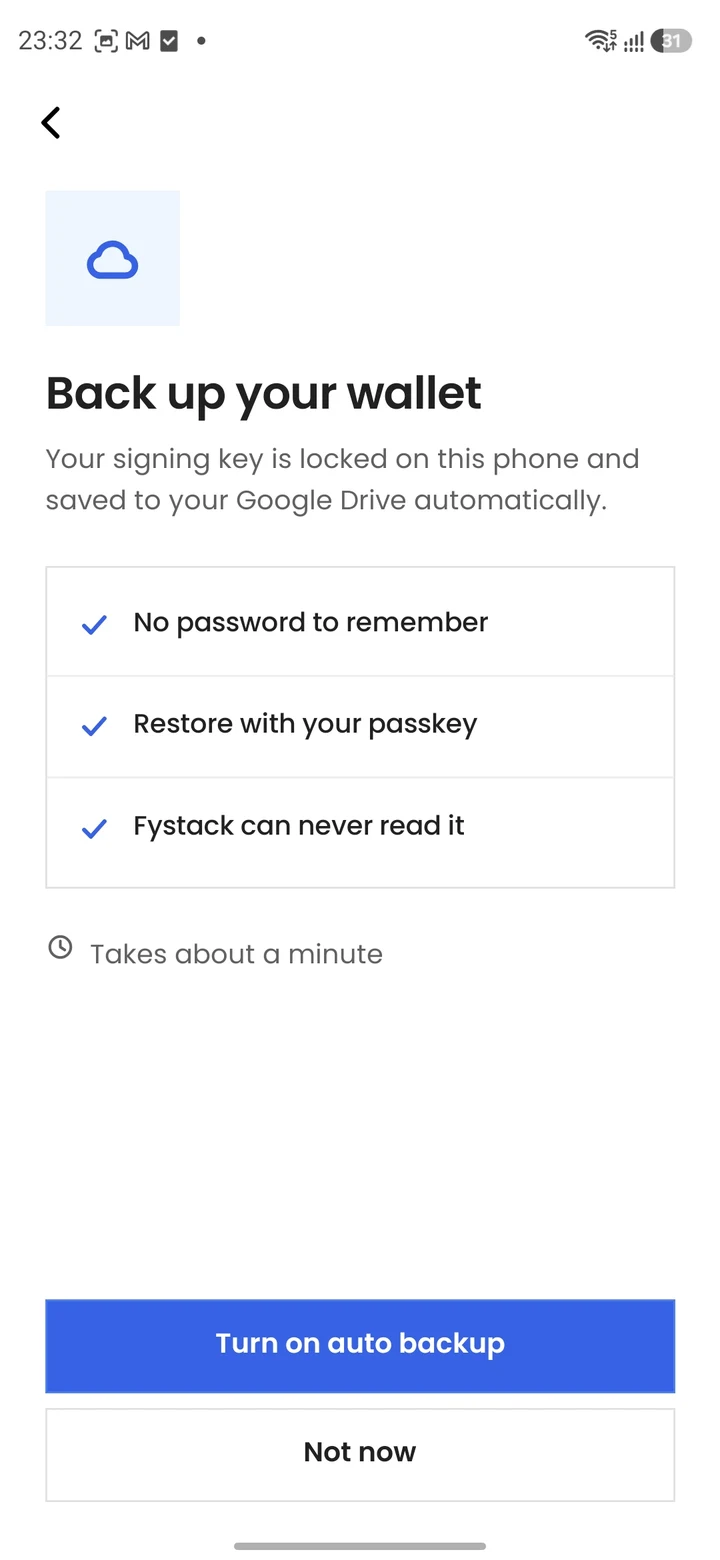
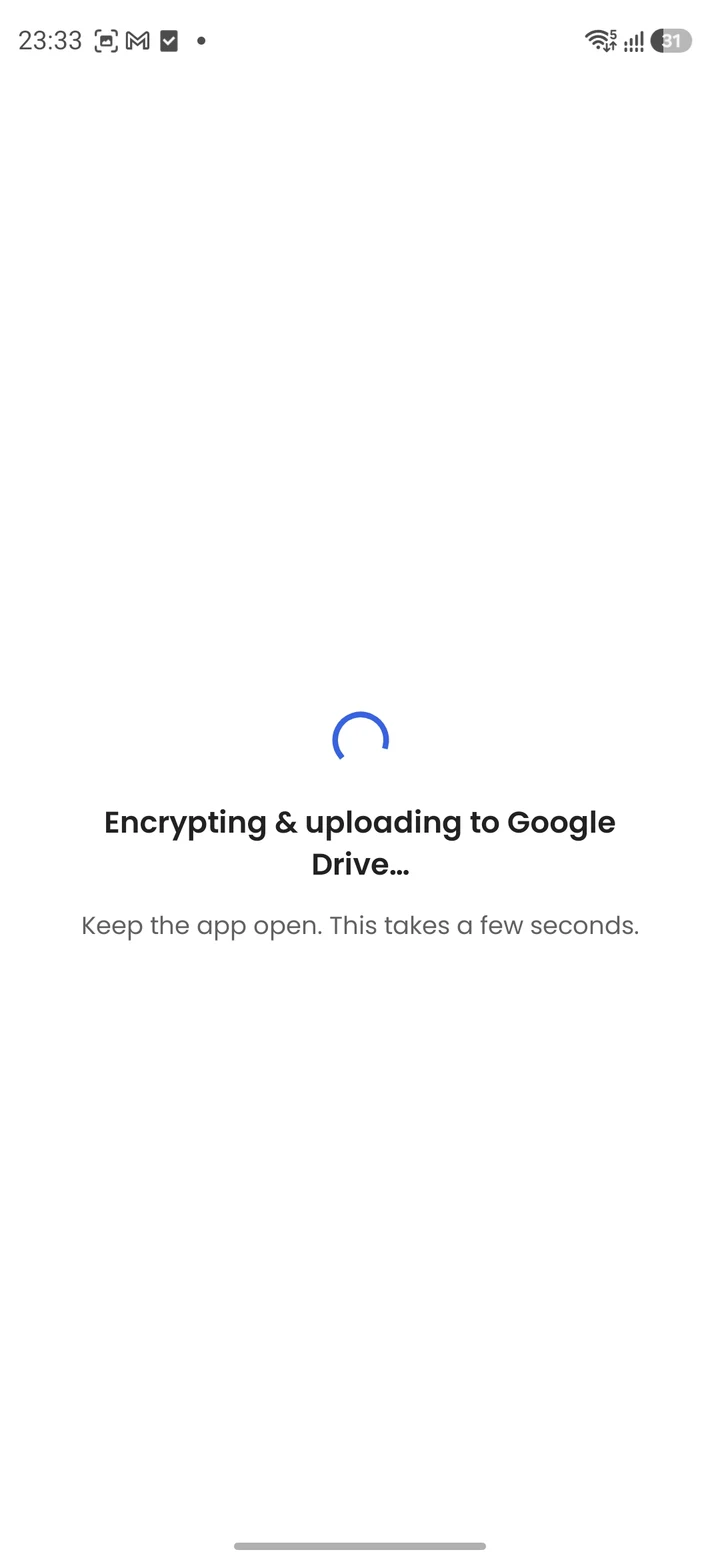
Once your key share is created, the app asks you to back it up. Tap Turn on auto backup. The key share is encrypted on the phone and saved to your Google Drive, so:
- You have no password to remember
- You restore it with your passkey
- Fystack can never read it
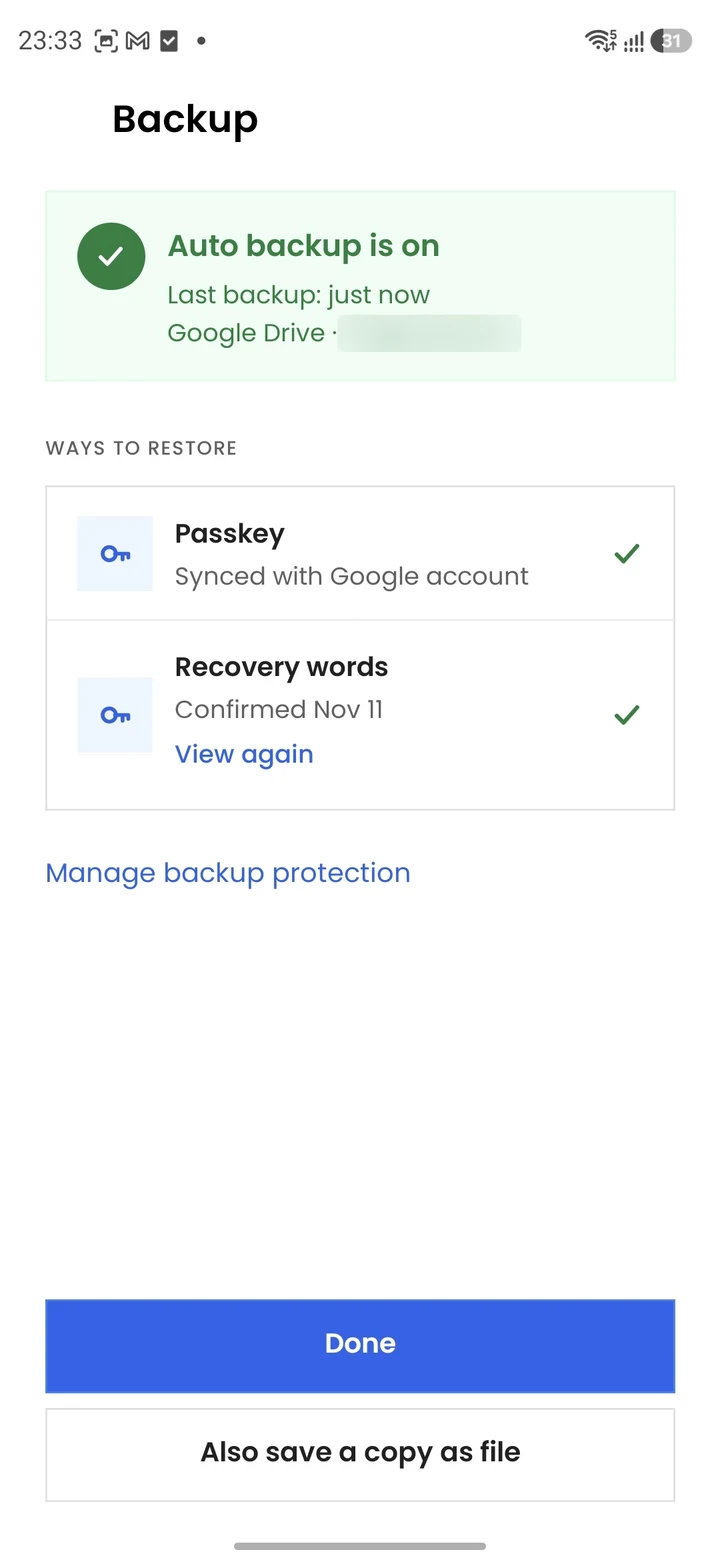
The Backup screen lists your Ways to restore: your synced Passkey and your Recovery words. Tap Also save a copy as file if you want an extra offline copy, then tap Done.
If you skip the backup and lose your phone, you lose your key share. With a 2 of 2 threshold, the wallet cannot sign without it.
Step 7: Confirm the Wallet Is Ready
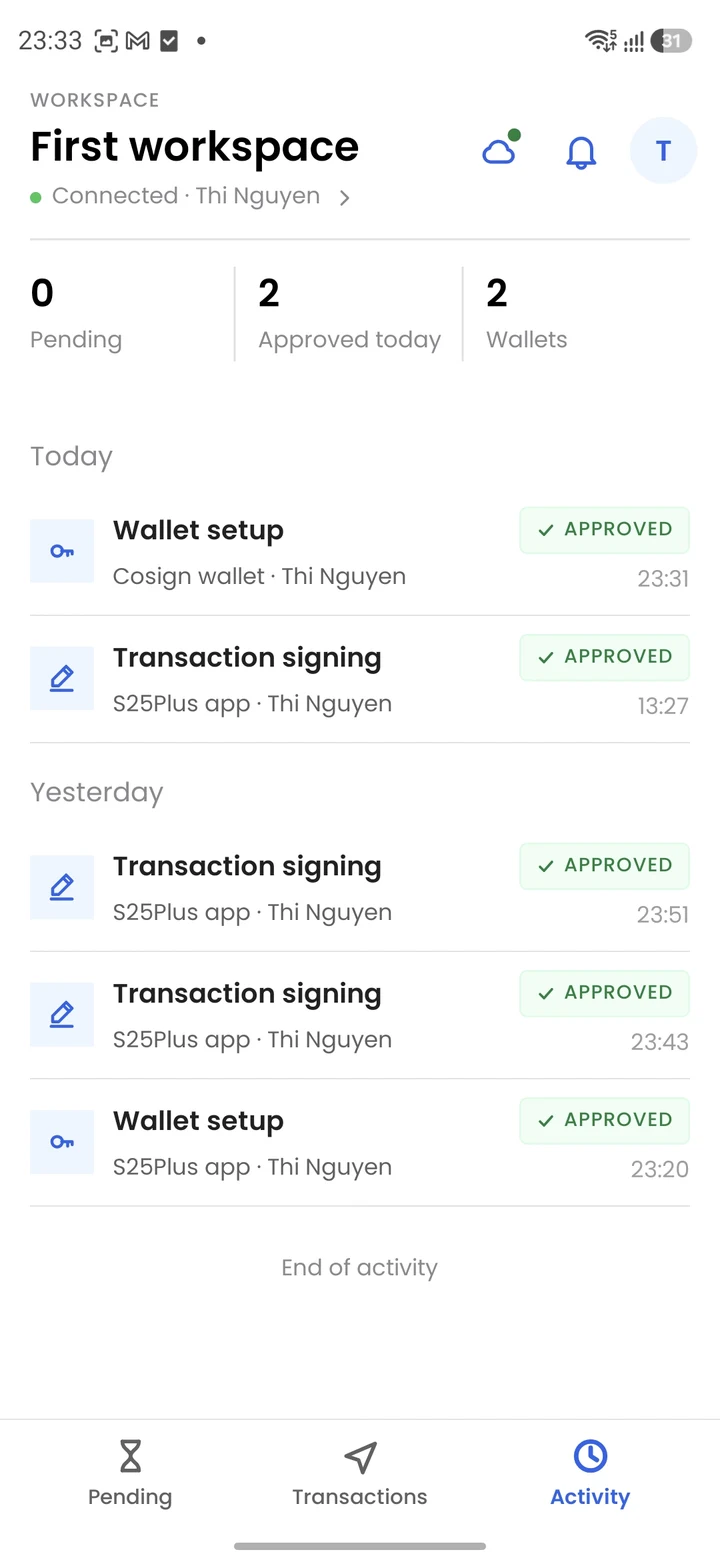
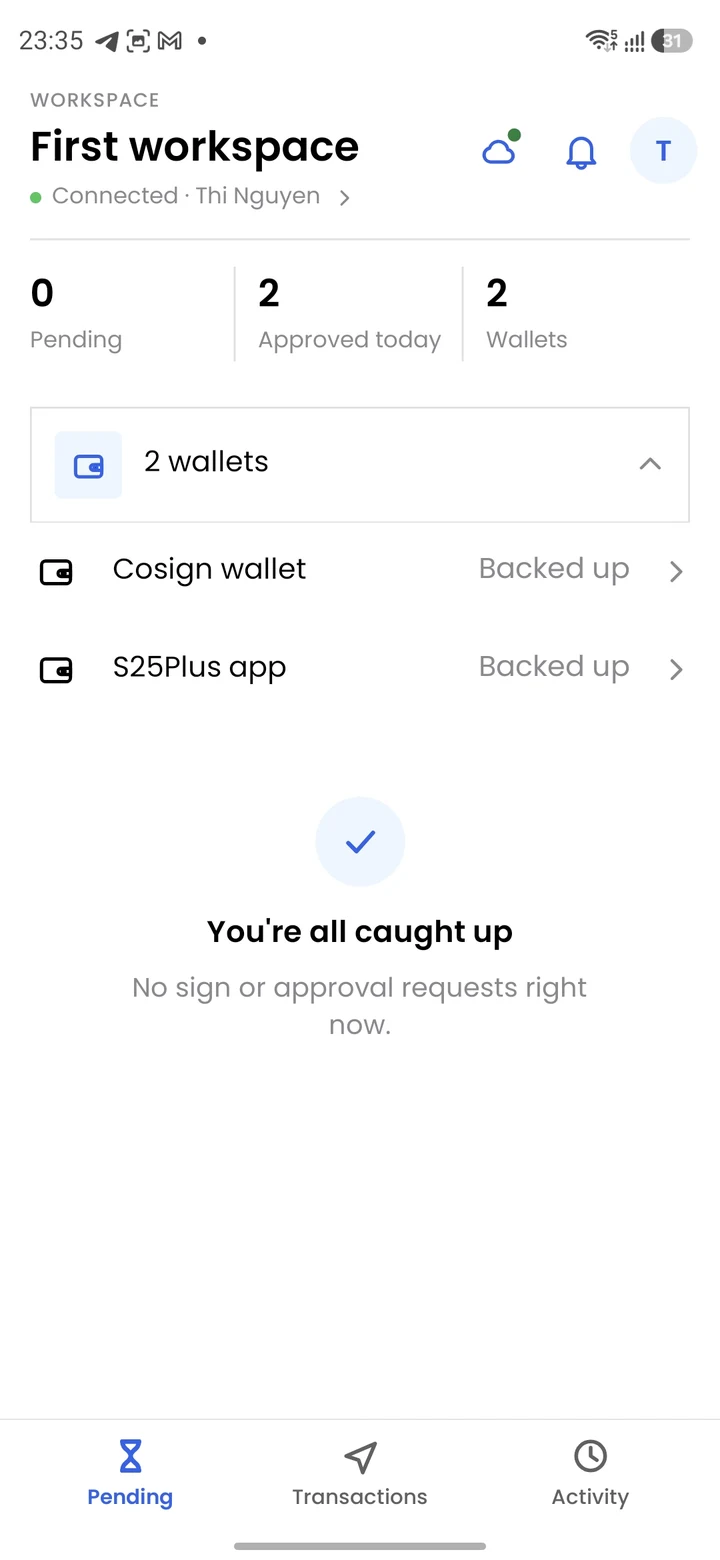
The approval shows as Approved in the Activity tab, and the new wallet appears in the wallet list marked Backed up. On the dashboard, the wallet is listed with the Co-signed signing model.
Withdraw and Sign
Withdrawals from a co-signed wallet need a signature from your cosigner before they are broadcast.
Step 1: Create the Withdrawal
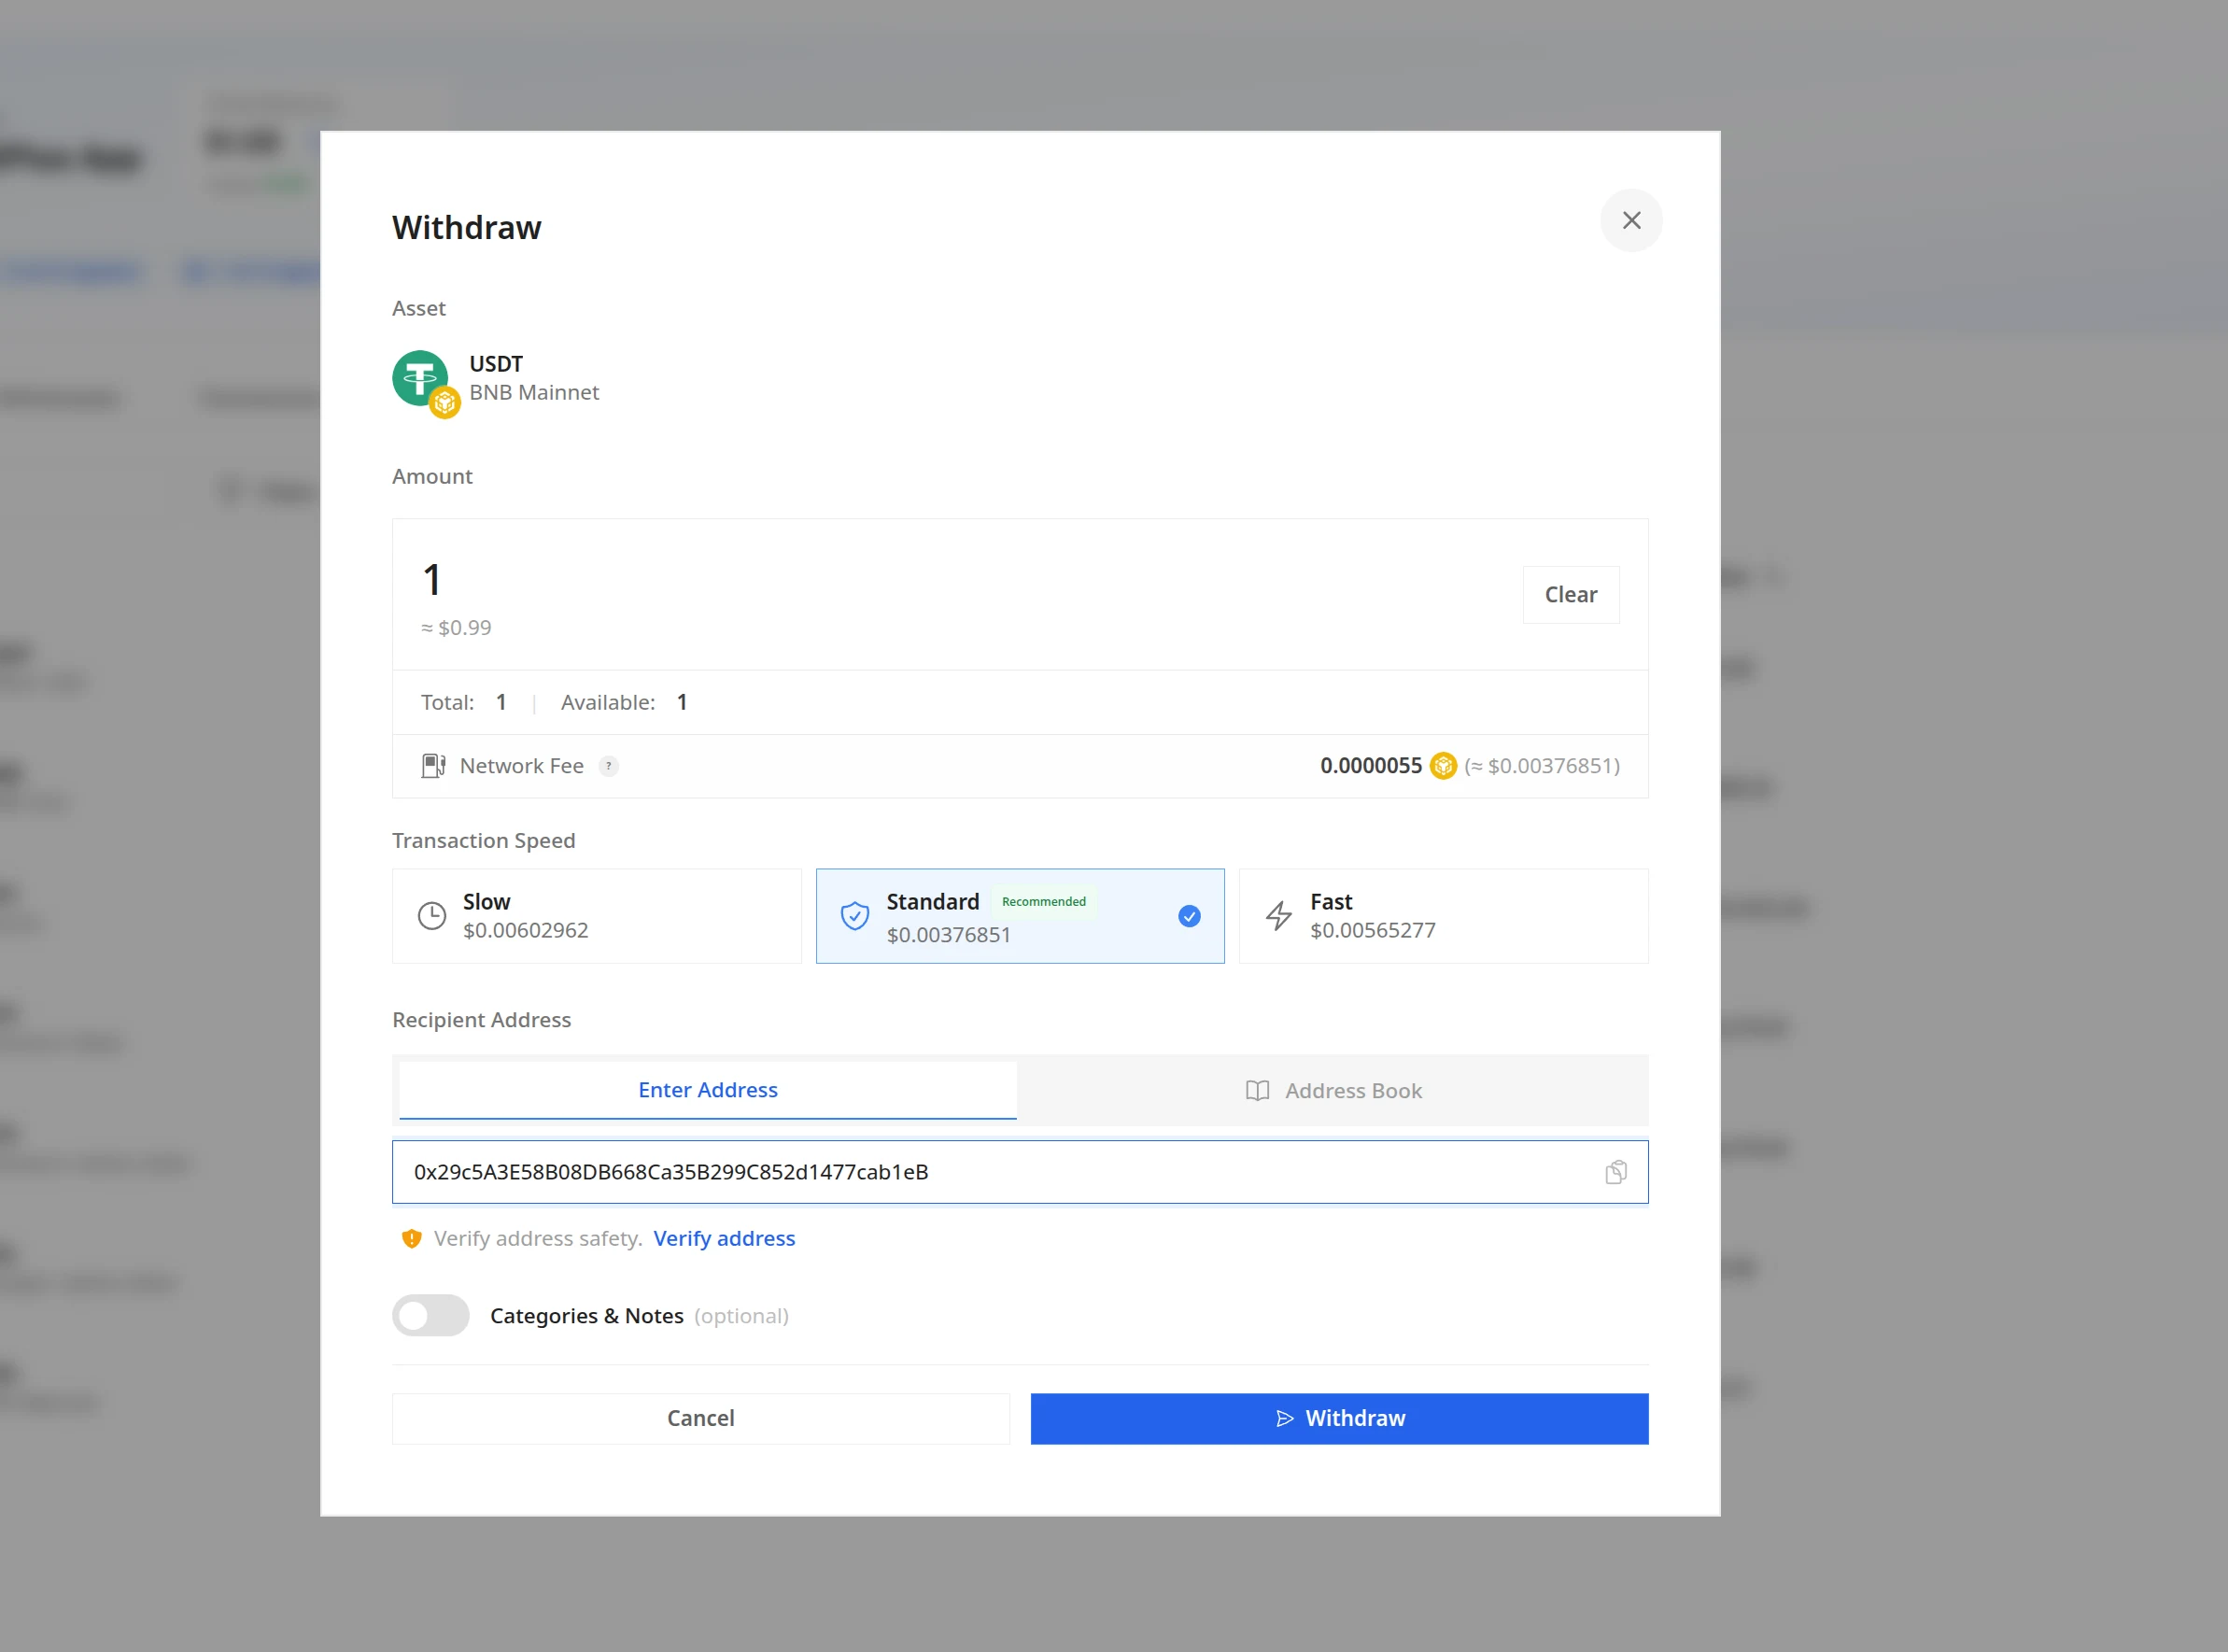
On the Fystack dashboard, open the co-signed wallet and click Send. Fill in:
- Asset and Amount
- Transaction Speed: Slow, Standard, or Fast
- Recipient Address: enter it or pick one from the Address Book. Click Verify address to check its risk score.
Click Withdraw. If the wallet has an approval group, the withdrawal is approved there first. See Withdrawal for the full withdrawal options.
Step 2: Review the Sign Request on Your Phone
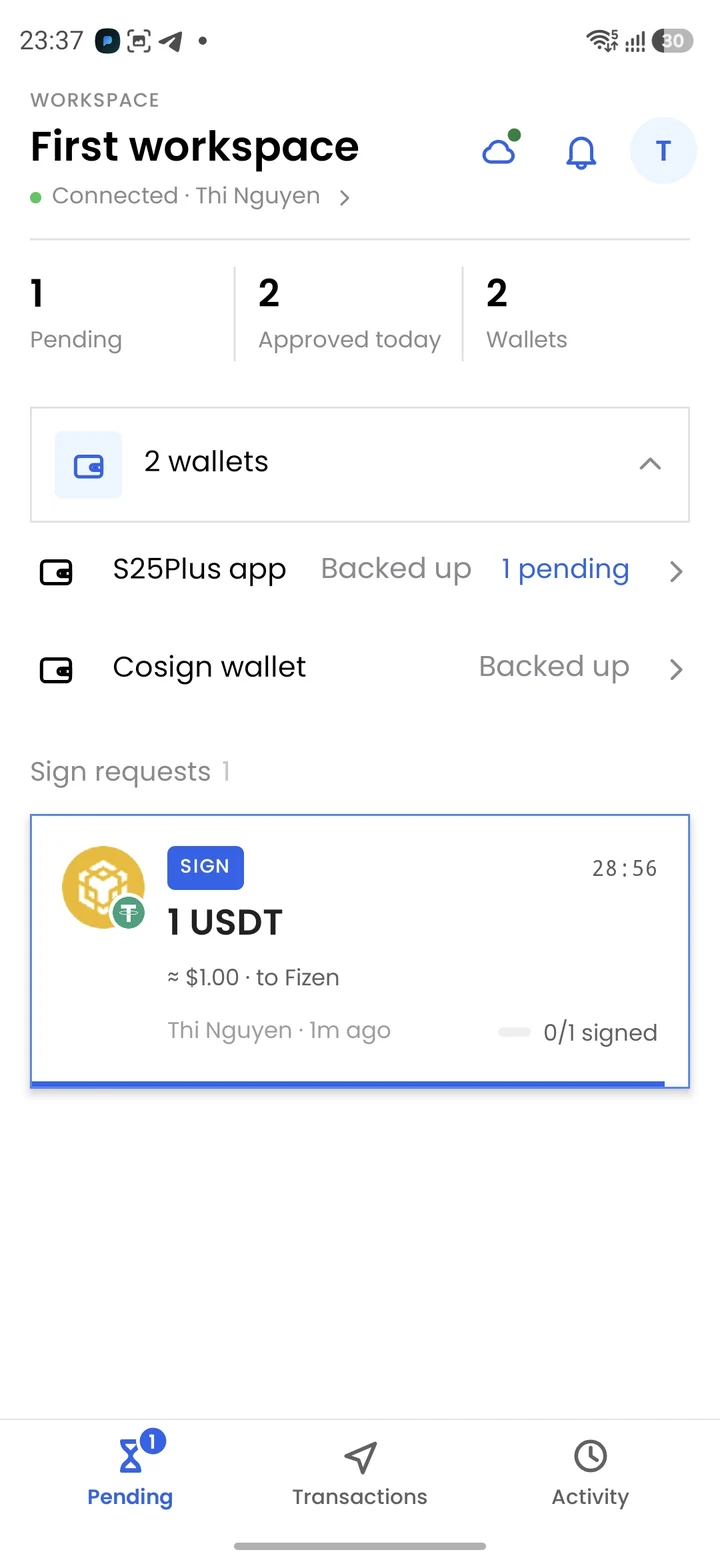
The Fystack Cosigner app shows a new item under Sign requests, and the wallet shows 1 pending. Tap it to review.
Check every detail before you sign:
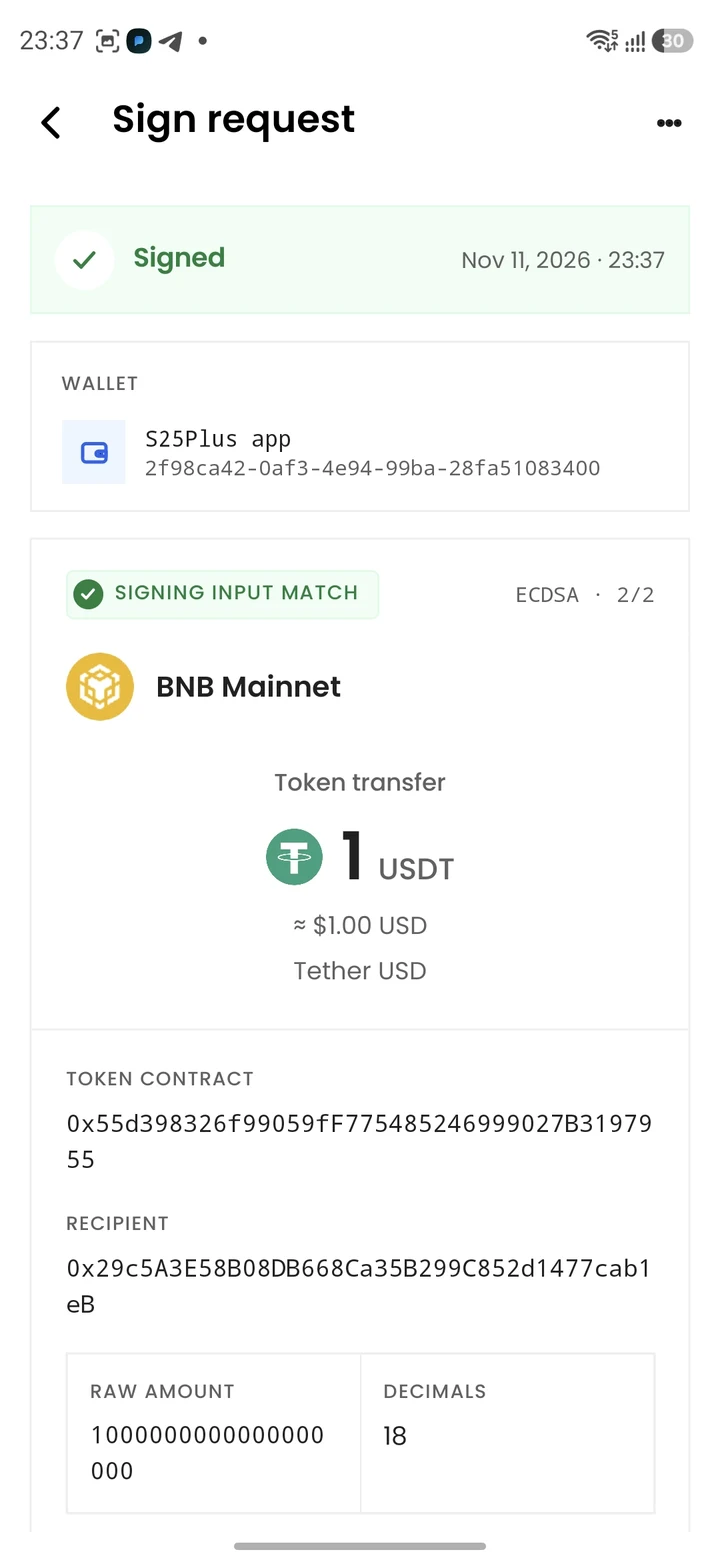
- Signing input match: confirms the app independently verified that what it signs matches the transaction shown
- Network, amount, and token
- Token contract and Recipient address
- Raw amount and Decimals
Press and hold Hold to sign. Tap Reject if anything looks wrong.
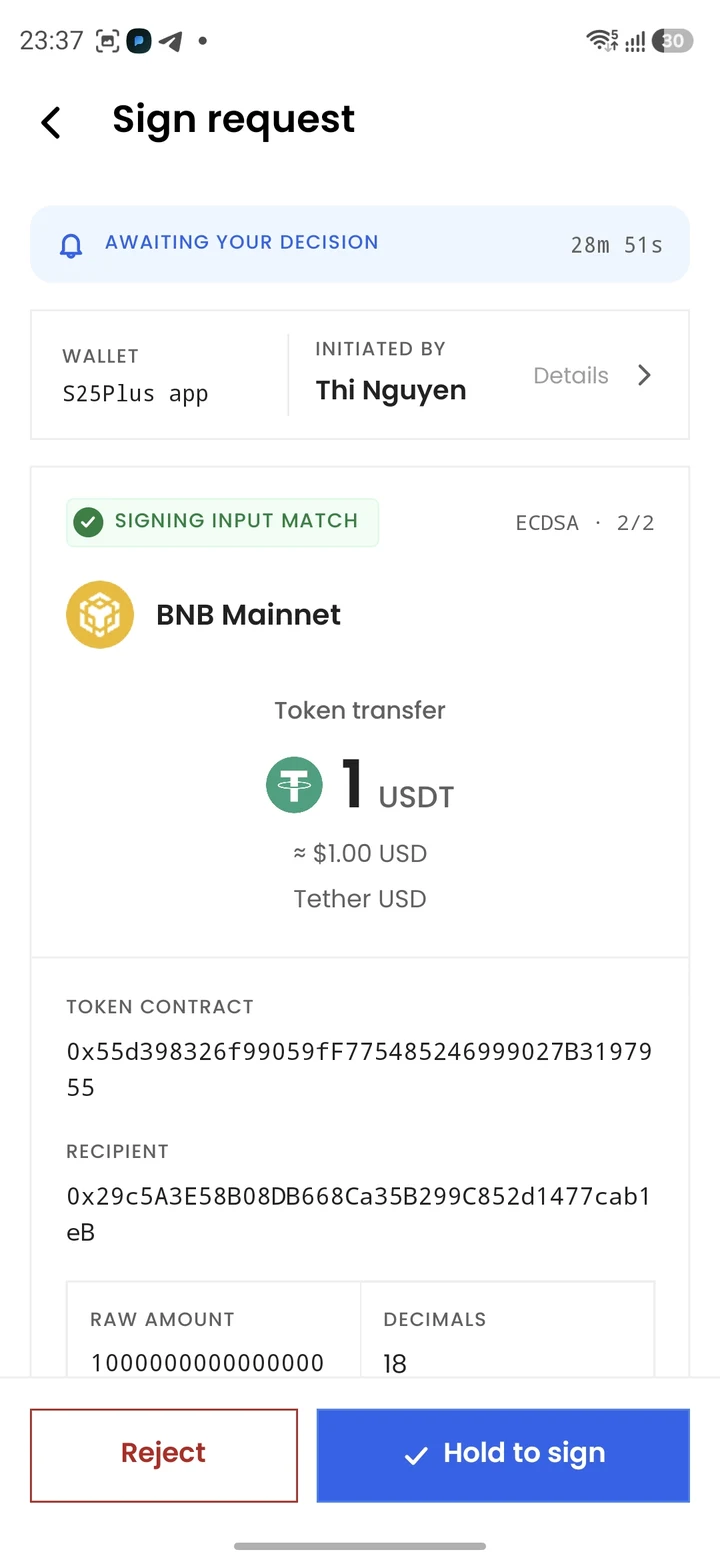
Always compare the recipient address on your phone with the address you entered on the dashboard. Your phone is an independent check: if the two do not match, reject the request.
Step 3: Track the Transaction
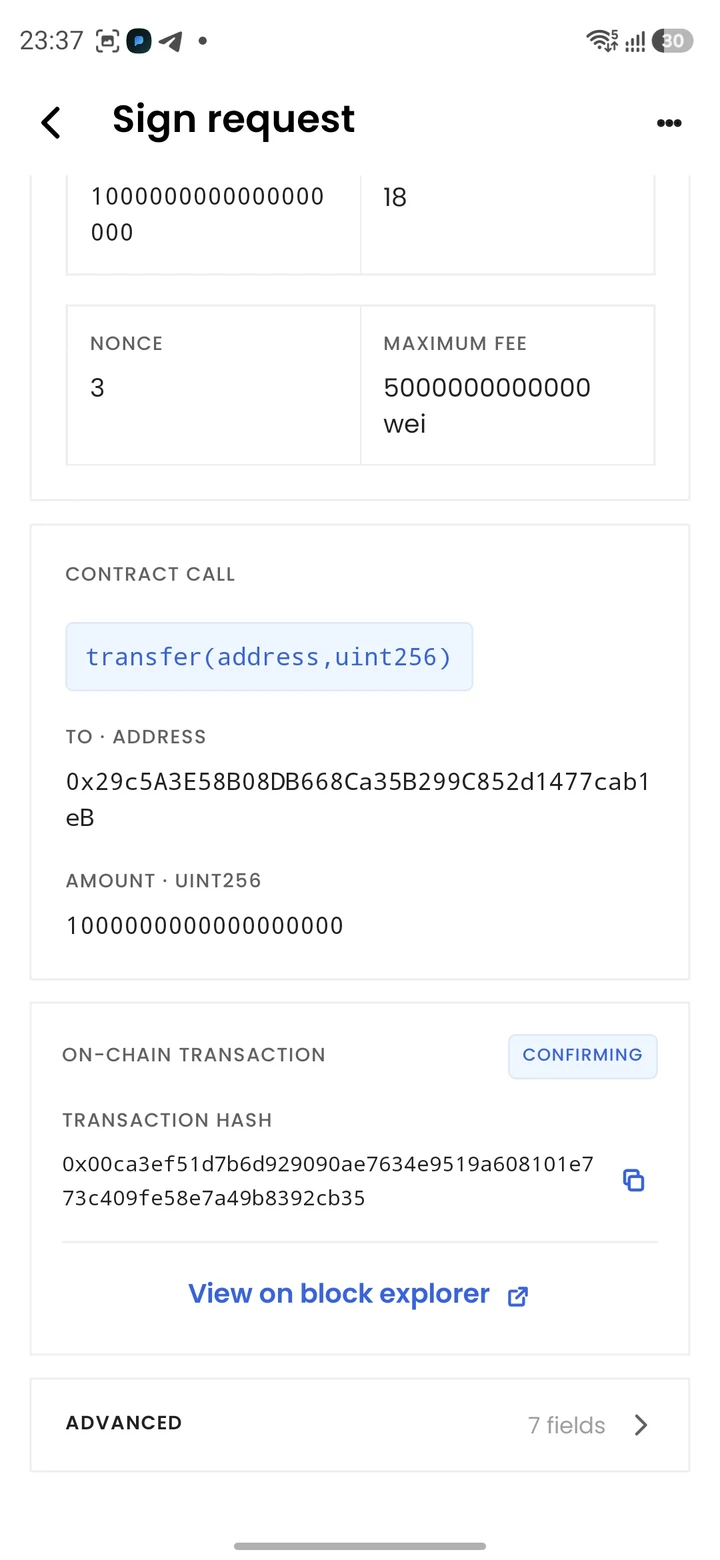
After you sign, the request shows Signed with a timestamp. Scroll down to see the decoded Contract call, the Nonce and Maximum fee, and the On-chain transaction with its hash. Tap View on block explorer to open it.
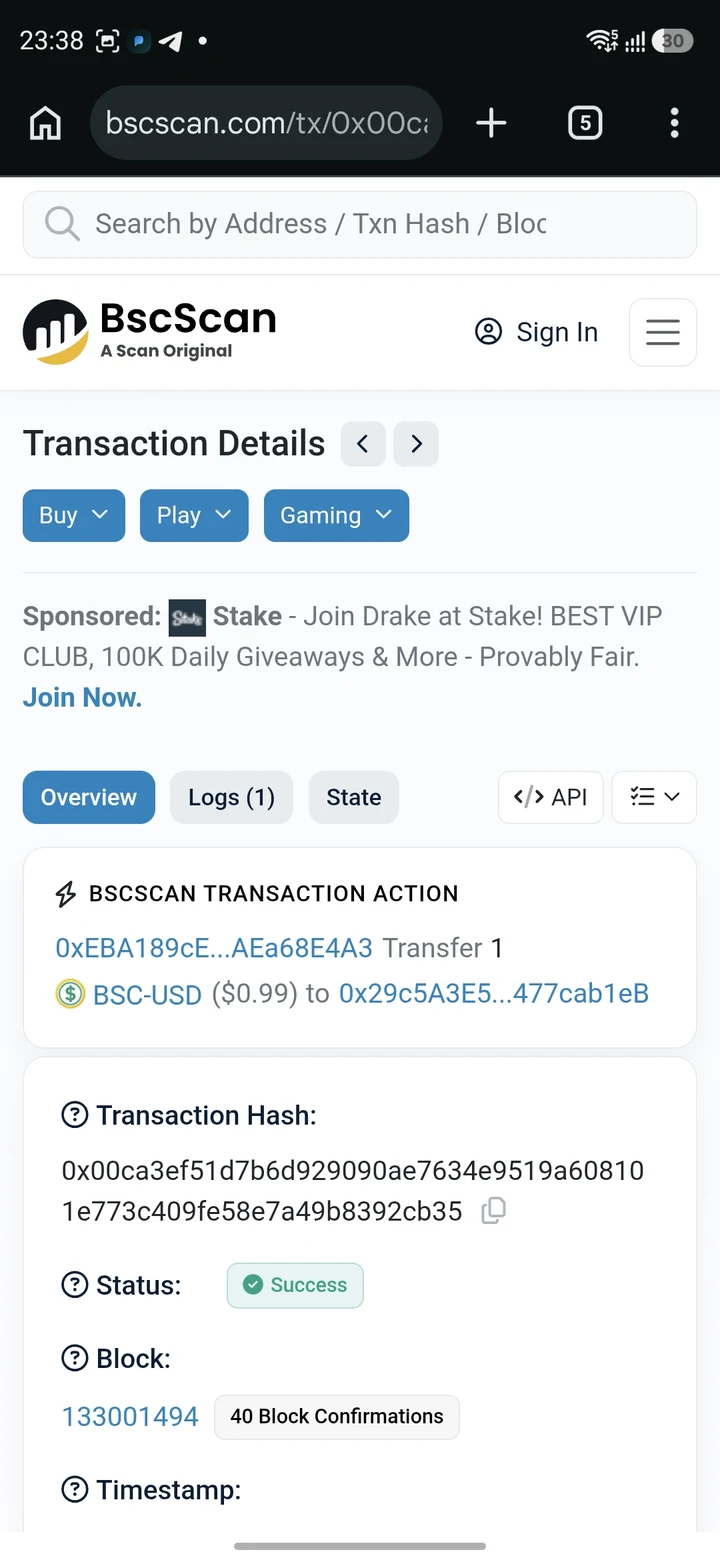
The Transactions tab lists every transfer you signed with its status. Once it shows Confirmed, the withdrawal is complete.